The History of the Pike Pole

One of the most versatile tools for firefighters along with its long history in the fire service is the pike pole. Next to the axe, the pike pole is one of the most recognizable tools of the fire service. In fact, this tool was used for thousands of years prior to entering itself into the fire service. This tool has been used in fishing, forestry and construction yet originated in the 12th century in Europe as a weapon for soldiers.

Once adapted into the fire service, the pike pole has been used to pull down interior and exterior walls, ceilings and roofs to help stop fire spread, through various phases of an incident.

During the initial fire attack, firefighters use this tool to tear away structural elements of the building in order to prevent the advancement of fire by exposing hidden fire for suppression and by removing upper windows for ventilation.

The pike pole is also used during the overhaul stage of the incident for the same functions previously mentioned in the initial attack stage allowing firefighters to open up to uncover and extinguish any hidden pockets of fire.

The versatility of this tool is not spoke to as much as it was, thanks to the advancements in modern technology with respect to fire service equipment. For years prior, this tool along with another pike or a tool of similar length and a tarp was used in creating makeshift stretchers to remove injured victims or down firefighters.

A typical pike pole normally measures from 4 feet - often referred to as a closet hook for its ability to be used in closets or other confined spaces where longer pikes wouldn't fit - to 12 feet in length and was traditionally made of hardwood. Today, many of these are made from fiberglass and other composite materials which are lighter and easier to maneuver.

The modern version of the pike poll came to the fire service in the 1960s and 1970s In New York City (the War Years). During this time, FDNY Captain Bob Farrell and the New York City Fire Department's Research & Development Division developed their version of the pike pole, often referred to as the New York Hook. This variant of the pike pole has two hooks at the head as opposed to the traditional one hook to help firefighters pull down metal roofing and drywall. An advantage of this tool is also its ability to remove roof cross-boards from joists by sliding the hook along the joist to quickly pop the boards during ventilation. Another thing to note about the New York Style hook is the flathead at the top as opposed to the point on the traditional pike pole. This function has the ability to use the hook as a hammer and hook combined - sounding floors, roofs and purchase points for opening walls.

New York Style Hook

Around this same time, various other fire specific hooks have been developed such as the Chicago Hook, the Denver hook, the San Francisco Hook and the Boston Rake Hook. All developed to efficiently tear apart the type of building construction most often encountered by firefighters in those areas - mainly plaster and lath or tongue and groove.

Above: Denver Hook, Boston Rake Hook & the San Francisco Hook

Nowadays, apparatus riding assignments are used and the pike pole is often paired with two firefighter riding assignments on the truck company, the hook & can firefighter and the outside vent firefighter. Both firefighters are assigned a 6 foot pike pole (most common size used) along with a water can (hook & can) and a halligan (outside vent).

The pike pole, rich is in storied history as a once weapon used by European soldiers, to its uses in fishing and construction is now a go-to versatile tool for the fire service.

Until next time, work hard stay safe & live inspired.

Attacking and Defeating the Hockey Puck Lock

Being a firefighter, we have various challenged consistently thrown at us and as such it is our job to defeat and overcome them.

As businesses and homeowners look to ramp up their security systems with more cameras around the perimeters and such, it is very common for high security locks to be added to various entrance points of the structure. The mindset is to make the structure as different as possible for criminals to enter and this trickles into making it more difficult for firefighters to make entry should an emergency arise that we need to get to.

When we think about gaining entry to a structure, we know it is something we must train on and something we must be proficient in. So, challenge accepted. Since as firefighters, there is no challenge we cannot overcome - or at least think we cannot overcome. The kitchen table is where we solve all the world's problems.

The challenge of this article is to list out various methods of forcible entry in defeating The American 2000 lock also known as "The Hockey Puck Lock".

This lock is found is a variety of places and sometimes may show up when you least expect it. Typically found on roll up doors on commercial occupancies, these locks can also be found on commercial garage doors, basement doors (Bilco doors) and box trucks.

Due to its round shape, this lock puts the keyway and pin & shackle within the body of the lock itself. By this design, it is created to cause difficulties for criminals to cut the shackle and gain entry.

Here are a few ways to attack and overcome the hockey puck lock

Method #1 - Attack the lock (no guard)

The lock could be attached to some kind of heavy-duty door or gate and quickly being able to identify if there is a guard around the lock or not will determine if you will be attack the lock itself or go through other means. For this method, we will go through the lock itself since there is no guard around the lock.

The quickest and most efficient way in attacking the lock is to use a standard pipe wrench (many truck companies have these in the cab or tool compartment of the rig) and get a solid bite on the lock with the wrench. From there, you simply pry downward with the wrench, breaking the hasp eye.

American 2000 (hockey puck) Lock Hasp

Method #2 - Through the Lock (with guard)

Hockey Puck Lock with Guard

Many of these locks will have a guard around them protecting the lock and therefore preventing the use of a wrench or striking down the lock by other means.

In this case, when faced with a guard around the lock, it is best to cut through the lock itself. For this method, it is best to use a rotary saw equipped with a metal blade.

  • Locate the keyway

  • Cut about three-quarters up the lock, opposite of the keyway

  • Cut completely through the lock and guard

This should damage the hasp and enable the lock to be removed from the door or gate.

For those unfamiliar with this type of lock, it could be a daunting task to complete. However, take time during pre-planning and non-fire incidents in occupancies to locate these types of locks and add them to your pre-incident size-up and practice these methods of entry with the crew. A few minutes breaking locks will save precious minutes on the fire ground figuring out how to get through it.

Until next time - work hard, stay safe & live inspired.

Forcing Trident Security Doors

Higher capacity security doors are becoming more and more prevalent in all commercial and now residential homes for maximum break-in protection. The Trident Multi-Point lock provides a multipoint deadbolt locking mechanism with maximum resistance to break-ins. Here's the breakdown of the Trident system. 

  1. Instant self-locking deadbolt protection on each close or manual locking

  2. 4-point locking system

  3. Anti-pry protection

  4. Maximum door reinforcement kits - door strengthening bars and lower module reinforcement kit

As firefighters sometimes our jobs are going through the door in order to perform our interior fire operations and it is imperative we have an understanding on how to force this type of door should we have no other option or this is our best option for a quick knock on the fire or a rescue effort.

Let’s force the door 

All hand tools approach - IRONS - Method 1 

  1. Starting on the hinge side, using the Adz end of the halligan, gap/crush the door to gain access to the backside of the door by placing the Adz behind the door and begin prying the standalone pin away. By getting the standalone pin out of the way early on will help with the conventional door pop.

  2. Now, attack the lock side of the door starting with the top pin followed by the bottom pin and pry them away.

  3. From here, once the three pins have been pried away, force the center of the door conventionally.

Please note, this will be time consuming and energy depleting. Have a K-12 or spreaders on hand if need be.

All hand tools approach - IRONS - Method 2

  1. Attack the lock side of the door by gaping and crushing the door and start by prying away top pin followed by the bottom pin.

  2. From here, once the two pins have been pried away, force the center of the door conventionally.

  3. The door should go and entry can be made.

From my experience, these doors have been found mostly on rear pharmacy doors and other businesses with highly valuable goods. The best way to approach these doors is to study their makeup and understand their strong and weak links in order to force them in less time and reduce the amount of strain on the crew forcing the door.

Keep your eyes open and stay diligent out there. 

Until next time, work hard, stay safe and live inspired.


Aerial Operations - The Aerial Truck Check, Part 1

Here is a look into how my Aerial truck check goes.

I usually start my Aerial truck check by walking around the Truck and checking for any obvious signs of an issue. Any issue, such as scratches dents, paint chips, doors missing, broken glass, you know the obvious things.

The next thing I do is go to the saw compartment. I take each of the gas- powered saws out of their compartment and start them. I allow them to idle outside is a position that they won’t wander off. If you don’t know what I mean here, just start a saw and place it on the ground in front of you. The saw will slowly wander off as it idles. So, place it in a crack in the ground or up against the wall of the firehouse. (NOTE: Make sure it doesn’t vibrate on anything that may become damaged, like paint on the firehouse wall.) I allow the saws to run the entire time I am checking the Truck. When Im done checking the truck, I fuel the saws, check bar and chain oil, and place them in service. The reason I do this with the saws is to allow them to run and get up to temp. It helps keep a healthy saw. Now there is a lot more to the saws here, but this is where I will stop for now.

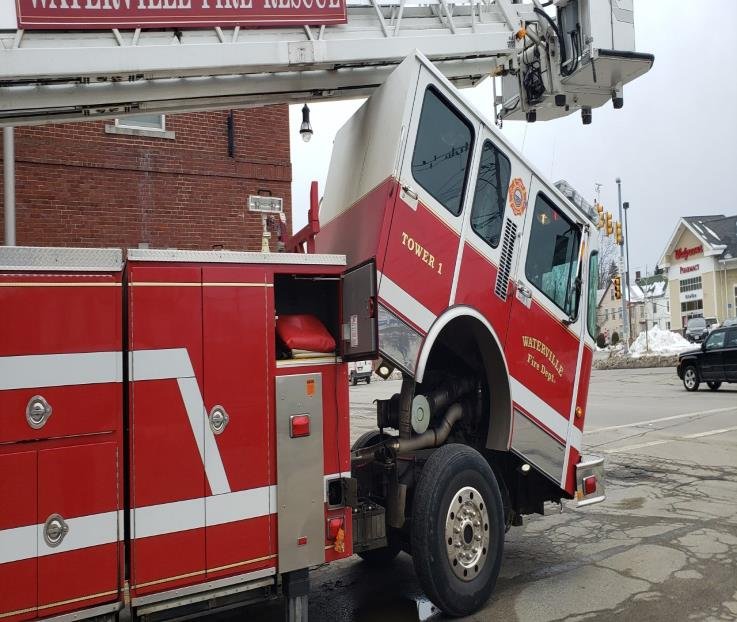
Next thing I do is pull the truck out of the bay. I am going to check the engine fluids of the truck. Some trucks you have access points to allow you to do this. I prefer to raise the ladder and then raise the cab of the truck. This allows me to get eyes on the undercarriage. I check the fluids, oil, transmission, window washer, and the DEF. I will check Hydraulic oil and the generator fluids at this time as well.

Continuing under the cab, I check the belts, pulleys and anything bolted on the motor. Especially that alternator. I don’t know why but, these have a habit of losing bolts. In our Aerial class one of the things that we do is a truck check before operating the truck. We have found more than once, a loose or missing bolt and have had to send someone to get a bolt to continue the class.

Once the motor and it’s various parts are in working order I move on the exhaust, brakes, and springs. Making sure all are in tact with no “shiny” metal. This usually means there is something broken. Lets hope whatever is broken, let’s say a spring, that it is shiny and not all rusted, if it is rusty this means it has likely been broken for some time and maybe we missed it on our last truck check.


THE AERIAL TRUCK CHECK

While the cab is still up check the back side of the tires for any deformities low tread, bubbles, chunks missing. Remember these are Emergency Vehicles, not a fleet truck. If there are any issues at all document it and bring it to the attention of the proper person. For me it is an e mail to the maintenance supervisor and the OIC for the day.

As we continue under the cab we grab a creeper, if you have one, and begin to roll under the truck. Now with the Aerial up and the cab in the air it should be obvious to others there is a truck check going on, but to be safe place an Out of Service tag on the vehicle to your department SOG’s. This way you ensure that no one will run the truck while you are under it.

Continue to check for obvious issues, again broken springs and other hardware. Check the hydraulic lines, any coolant lines that may run here. Air brakes and the cans in the rear. It’s a good idea to drain the air tanks while you are here, this will remove the moisture from the air tanks and help prolong your airbrake system.

Look for anything leaking fluid. Investigate it. I know some trucks have their quirks but again these are Emergency Vehicles.

Check the inside tires for any issues, check air pressure on all tires, top off to your truck’s specifications.

Next month we will dive into the compartments of the truck and the aerial. Please remember this is just a way to do something and hopefully give you a few tips along the way. My approach is systematic and works for me. It may not all work for you. As always if you have something that may help, drop me an e mail and Ill put in here! Oh and BTW, the saws are still running, make them ready and put em back on the truck!

Peaked Roof Ventilation

The Cuts

There are many types of cuts, and we will discuss a few. But the main objective is to release the heat, smoke, and toxic gasses. To do this your hole size needs to be big enough to make a difference. Unfortunately, the day of the 4x4 hole is over. This size just doesn’t release the amount of heat needed to be effective. With all the synthetics and plastics in today’s homes, and the rate of heat release these products produce, it just makes sense to make the hole larger. You may not find this in many books, but from my experience and the experience of other like-minded Firefighters I network with; we agree that at least a 4’x6’ hole is the new minimum.

There are many ways to accomplish this size and larger hole. I am a big fan of two cuts. The Louver cut and The Milwaukee cut. Each has their place. Now there are many more to consider but these are the two I am going to talk about.

THE LOUVER CUT

A two panel louvered cut on a residential roof will provide an opening that is about 4x8 foot. Starting at a high point, near the ridge and working your way across the top. Start your cut by plunging your saw into the roof, slide the saw to the left until the resistance is greater. This means you have hit the roof rafter. Now slide the saw in the same kerf cut to the right until that heavy resistance is meet again, now roll the rafter. To roll the rafter, you lift the saw out of the roof material and cut just the sheeting not the rafter. Then as you have gone over the rafter plunge the saw again until the next rafter. Continue this for process. Cut, roll the rafter, cut, roll the rafter, and cut to the rafter. This will give you about six feet in length. Now cut downward toward the soffit, about four feet. If you’re unsure how far four feet is, count rows of shingles. Each row is about six inches. That’s a foot for every two rows. Cut down eight rows. Now work your way back. Same cut and roll method. This time after you roll the rafter, stop. Reach up to the top cut, make a cut from your top cut to the bottom cut. This should be half way between the rafters. Continue working your way back to your roof ladder. Make the last vertical cut and now wait for the word to open up. Punch through with your six-foot hook, the roof material will “louver” on the rafter.

After the cut is made do not forget to punch through the ceiling material to allow for proper ventilation. As soon as the cut has been made, firefighters should evacuate the roof as quickly and as safely as possible.

THE MILWAUKEE CUT

The Milwaukee cut is a great cut that catches all aspects of your roof. It runs from the peak to the soffits. It is usually around four feet wide. To start the cut is just like the start of your louver cut. The only thing I would add is an inspection cut at the top left and right. This becomes important when you are ready to pull the material from the cut. As this allows you to get the hook into the material and pull. I should add that it can be done with a rotary saw as well as a chain saw.

This cut is labor intensive. It can be done with two Firefighters but 3 is optimal. You will need two roof ladders, one on each side of your cut. How you accomplish this cut is up to you. Meaning that you can run two saws or one. But I like the old adage that two is better than one.

Either way, after making your cut across the top and then making your inspection hole, continue the vertical cut all the way to the soffit on both sides.

Climb back to the peak and begin pulling the material from the cut. Again punch through the ceiling material.

The advantage to this cut is in a lot of New England homes there are many voids in the roof area. Especially in Cape Cod style homes. With the attic space above and the knee walls all open this allows you to properly vent the whole structure

SAFETY CONSIDERATIONS

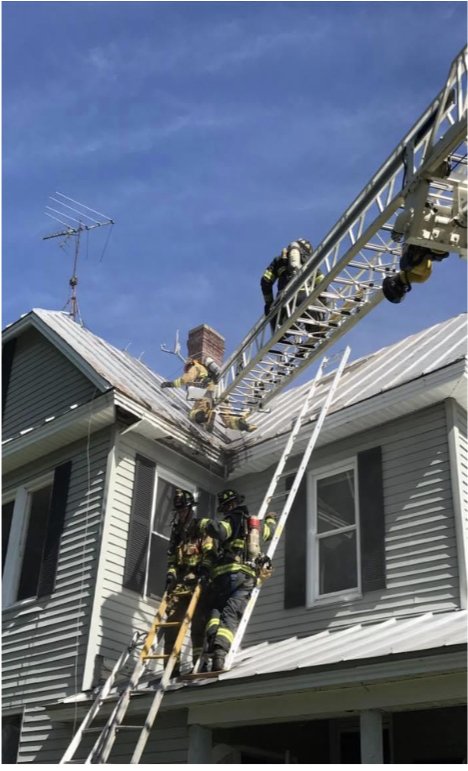
Pitched roof ventilation can be one of the most hazards operations on the fireground, yet it is one of the most important assignments.

There are numerous things to consider when working on a roof. Number 1 the fire is under you! Sounding the roof is a must, know and understand the sound of a solid and a spongy roof. Know that in older homes the ridge and valleys are usually the strongest, but still sounding is a must.

Use a roof ladder whenever you can. Yes you can walk a pitch of 6/12 or less but err on the side of caution. If you cannot see, meaning heavy smoke conditions, then get on your knees. When you have an SCBA on you have balance issues, add a pitched roof and low to no visibility, this could be a bad combination. Always try to work your way back to your roof ladder. This may not be able to be done 100% of the time but do it as much as you can. Know the signs of a bad roof. Bubbling shingles, smoke slithering from under shingles or through metal roofing. Any sags in the roof or in between the rafters. Understand building construction, especially roof construction. Understand what types of roofing material is on the roof, how many layers of shingles and sheeting material. If you are unaware of the construction type, then cut inspection holes. This may save you some time and may even save your life.

Mother nature is always messing with us. From snow to sleet to freezing rain. Be aware of these conditions and take appropriate actions. Use of a roof ladder even on a low pitch is a good start. Some type of striking tool, should already be in your tool selection, to break away the ice, maybe add a shovel as well.

Get out in your community and see what’s out there! Because you don’t know what you don’t know!

For more, check out Ryan Johnston and MAINE-IAC Training. www.maineiactraining.org

Follow Ryan on Instagram @maineiactraining

Truck Company Operations: LOVERS__U

The fire service loves acronyms and we have a lot of them. For this discussion we are going to talk about the old acronym for all you truckies out there – LOVERS_U. Before we get into the acronym and details of it, let’s first talk simply about truck company ops.

Truck operations involve a variety of tasks; forcible entry, search, rescue, ventilation, ladder operations (ground/aerial), overhaul, etc. Nowadays with the lack of manpower, squad and engine companies may be needed to perform these operations at any time on the fire ground and are equipped with the tools to do so. Some engine companies may need to perform both truck and engine operations due to lack of manpower or the absence of a truck on scene and vice versa for companies who run quints.

Well here we are, a truck company; what do we do?

Let’s being here with LOVERS_U:

1. Size-up (Yes, truck has its own size up to do). Everything we do on the fire ground calls for a scene size up (and a continual one) to better help us make smart tactical decisions to effectively complete our tasks especially with ventilation. Can this start the LOVERS_U? Hmm….

2. Forcible Entry, if needed (for searching and fire suppression). Sometimes the doors may be unlocked so like they say, “trybefore you pry”. This action should be determined quickly upon arrival in the case of victim removals. Please remember to keep this simple. Remembering your basic tools such as the irons, a hook and/or saw along with variations or combinations of each, can save time and get the job done. The key here is to know your tools and how to use them efficiently.

3. Search (Rescue, if needed). This is very important because we are not only searching for victims but searching for fire both of which may or may not be identifiable from the outside which is why searching is critical on the fire ground. Let’s remember searching for fire can also be done by the suppression team as well. Don’t forget your TIC.

4. a. Ventilation for search team (Vent for life). By venting for life, it is allowing a lot of the thick, black smoke remove itself from the structure giving search teams inside better visibility and time for locating victims.

b. Ventilation for fire suppression (Vent for fire). By venting for fire, this assists the fire suppression team in making an easier push to the fire and much easier extinguishment. This is done with very precise communication between your crew, the suppression team inside and the IC. If done haphazardly, this can be catastrophic.

5. Ladder the building (ingress, egress, vertical/horizontal vent). Every window accessible should have a ladder on it for emergency egress and also for access to the roof and 2nd floor windows for vertical vent. Why not throw a ladder up while heading with your crew to your assignment? Kill 2 birds with 1 stone.

6. Overhaul/Salvage. Once the fire is determined to be out, now it’s time to get inside and open the place up. This is to look for any hotspots and perform another search should any victims have not been found. During this operation, SCBA is still required along with a TIC and hand tools. Using tarps are also considered to help salvage as much property as possible and avoid any smoke and/or water damage.

7. Utilities. This is also known as shutting  down the utilities. Depending on where the utilities are located, this is done by either an interior crew or an exterior crew. Having control of gas, electric and water will help increase the safety of all fire service personnel on the scene.

Now that we discussed primary responsibilities of the truck company, we can now collectively say we have described and discussed LOVERS_U. For all those on truck companies or working with truck company responsibilities keep this acronym in your toolbox when pulling up to a scene, during your pre plans and in your training. It’s a valuable guide to helping you get the job done efficiently, effectively and most importantly safely. 

Until next time; work hard, stay safe & live inspired.

 About the Author

 NICHOLAS J. HIGGINS is a firefighter with 16 years in the fire service in Piscataway, NJ as well as NJ State certified level 2 fire instructor and currently a State of New Jersey Advocate for the National Fallen Firefighter’s Foundation. A martial arts practitioner in Taekwondo, Brazilian Jiu Jitsu and Muay Thai as well as a former collegiate athlete in baseball, Nick is also a National Exercise & Sports Trainer Association Battle Ropes Instructor and studying for the Functional Fitness Instructor certification.  He holds a B.S. in Accounting from Kean University and is the founder/contributor of the Firehouse Tribune website.